
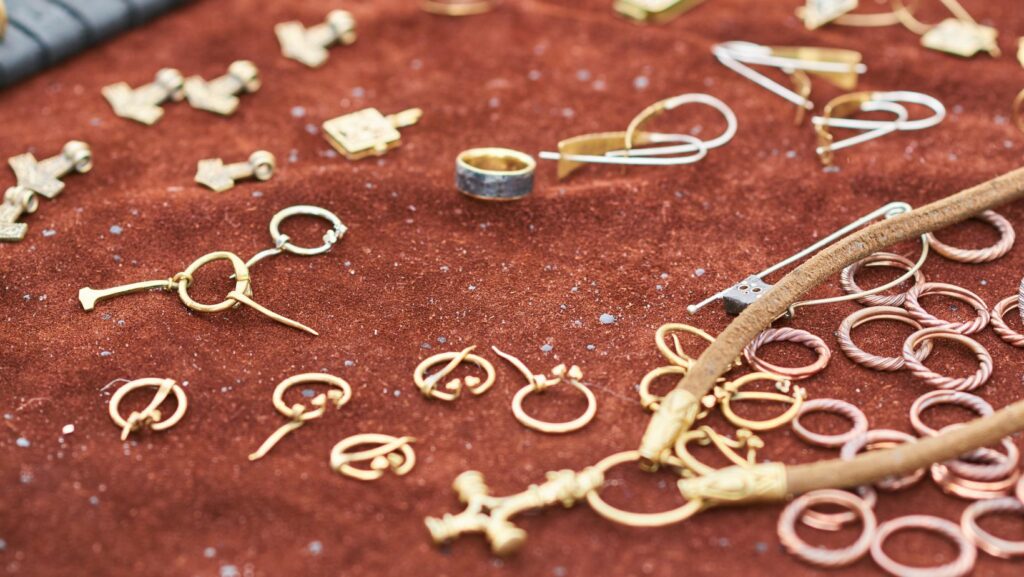
Beading Basics
Beading is a form of jewelry making that involves stringing beads onto a wire or thread. There are many different techniques that can be used to make bead and wire jewelry, and the type of technique you use will often dictate the type of jewelry you can create. In this section, we will cover the basic techniques you need to know to get started making bead and wire jewelry.
How to Make Bead and Wire Jewelry
In order to get started with beading and wire jewelry, you’ll need a few supplies. Here’s a quick rundown of what you’ll need to get started:
-Beads: You’ll need beads of various sizes, shapes, and colors. The type of beads you choose will depend on the project you’re working on.

-Wire: Wire comes in different gauges, or thicknesses. The type of wire you’ll need will depend on the project you’re working on.
-Wire cutters: Wire cutters are used to cut wire. They come in different sizes, so choose a size that is comfortable for you to use.
-Pliers: Pliers are used to bend wire and to open and close jump rings. Again, they come in different sizes so choose a size that is comfortable for you.
-A bead reamer: A bead reamer is a handy tool that is used to enlarge the holes in beads. This is helpful if you want to string beads onto a thicker piece of wire.
-A bead board: A bead board is a piece of cardboard or foam that has small holes drilled into it. Bead boards are used to lay out your design before you start stringing beads. They help to keep your beads organized and prevent them from rolling away!
Getting Started
No matter what kind of beading you want to do, you’ll need some basic supplies. Here’s a list of what you’ll need to get started:
-Beading needle: A beading needle is a small, thin needle with a large eye. It’s specifically designed for threading beading wire and thread through small beads. You can find beading needles at most craft stores.
-Beading thread or beading wire: Beading thread is made of nylon or polyester, and it’s specifically designed for beadwork. It’s very strong, yet it can break if it’s snagged on something sharp. Beading wire is made of metal (usually copper or steel) and it’s also specifically designed for beadwork. It’s stronger than thread, but it can kink if you’re not careful.
-Scissors: You’ll need a good pair of scissors to cut your thread or wire when you’re finished beading. Make sure the scissors are sharp so they will make clean cuts through the beads and won’t damage the thread or wire.
-Pliers: Pliers are useful for a variety of tasks, such as opening and closing jump rings, shaping wire, andstraightening bent wire. You’ll need two types of pliers: flat-nose pliers and round-nose pliers. Flat-nose pliers have flat jaws that are useful for gripping objects tightly. Round-nose pliers have pointed jaws that taper to a point; they’re useful for making loops in wire. You can find both types of pliers at most hardware stores.
Once you have your supplies, you’re ready to start beading!
Making a Beaded Bracelet
Stringing beads onto a wire is a great way to create unique jewelry. You can use different colors and sizes of beads to create a one-of-a-kind bracelet, necklace, or anklet. All you need is some wire, beads, and a few tools. In this article, we’ll show you how to make a beaded bracelet.
Materials Needed
To make a beaded bracelet, you will need the following materials:
-Beads (seed beads, bugle beads, or any other type of bead you desire)
-Beading wire
-Wire cutters
-A clasp (toggle or lobster claw)
Instructions:
1. Cut a length of beading wire twice the desired length of your bracelet, plus six inches. For example, if you want your bracelet to be eight inches long, you will need to cut a piece of wire that is 20 inches long.
2. String your chosen beads onto the wire. You can string them in a pattern or simply string them randomly.
3. Once all the beads have been strung onto the wire, it is time to attach the clasp. Take the end of the wire and make a small loop (called a wrapped loop) using your wire cutters and round-nose pliers.
4. Attach one half of the clasp to this loop.
5. To finish the other side of the bracelet, thread the end of the wire back through some of the beads until it meets up with the other end of the bracelet. Make another wrapped loop and attach the other half of the clasp.
6. Trim any excess wire and enjoy your new bracelet!
Step-by-Step Instructions
1. Choose your beads. Pick out the beads you want to use for your bracelet. You can mix and match different colors, sizes, and shapes of beads to create a unique look.
2. Cut a length of beading wire. Measure the circumference of your wrist and add 2 inches. Cut a piece of beading wire at that length.
3. String the beads onto the wire. Thread the beads onto the wire, using your fingers or pliers to help guide them through if needed. You can string them in any order or pattern you like.
4. Make a loop at one end of the bracelet. Use your pliers to make a small loop at one end of the bracelet wires, about 1/2 inch from the end. This will be where you attach the clasp later on.
5. Finish off the other end of the bracelet with another loop . Again, use your pliers to make a small loop at the other end of the bracelet wires, about 1/2 inch from the end. Make sure both loops are facing in the same direction so they’ll be easy to attach together later on.
6 . Attach a clasp to one end of the bracelet . Open up one of the loops and hook it onto one half of a jewelry clasp. Close up the loop again so it’s secure around the clasp .
7 . Attach the other half of the clasp to the other end of the bracelet . Open up the remaining loop and hook it onto the other half of the jewelry clasp . Close up the loop again so it’s secure around this half of the clasp as well .
Creating a Beaded Necklace
Making your own beaded necklace is a fun and easy project that you can complete in just a few hours. You’ll need some basic supplies like wire, beads, and a clasp, but the possibilities are endless when it comes to design. In this article, we’ll walk you through the steps of creating a basic beaded necklace.
Materials Needed
Before you start stringing beads, you’ll need to gather a few supplies. In addition to beads, you’ll need beading wire, wire cutters, and clasps.
Beading wire is available in a variety of materials, including nylon-coated stainless steel, silk, and linen. The type of beading wire you use is ultimately a matter of personal preference, but nylon-coated stainless steel is a good choice for beginners because it’s strong and doesn’t kink easily.
Wire cutters are essential for cutting beading wire and for trimming excess wire after you finish your necklace. Look for a pair of flush-cutters, which have blades that meet flush against each other when they’re closed. This will help prevent your wire from becoming misshapen when you cut it.
As for clasps, there are many different types available. Spring ring clasps are common and easy to use, but toggle clasps are also popular. Experiment with different styles to find the type that works best for you.
Step-by-Step Instructions
Creating your own beaded necklace is a fun and creative way to express your personal style. With just a few supplies and some basic jewelry-making techniques, you can design a one-of-a-kind necklace that’s perfect for any outfit.
In this project, we’ll show you how to make a beaded necklace with wire and beads. You can use any type of beads you like, but we recommend starting with seed beads or pearls. Once you master the basics, you can experiment with different bead sizes, shapes, and colors to create unique necklaces for every occasion.
So, let’s get started!
Step 1: Gather Your Supplies
To make a beaded necklace, you will need the following supplies:
-Beads (seed beads or pearls)
-Wire (22-gauge craft wire or 26-gauge jewelry wire)
-Wire cutters
-Needle nose pliers (optional)
Beaded Earrings
One of the most popular trends in jewelry today is beaded earrings. They are easy to make and can be very fashionable. You can make beaded earrings with just a few supplies and a little bit of time. In this article, we will show you how to make beaded earrings.
Materials Needed
In order to make wire and bead jewelry, you will need some basic tools and materials. Most of these can be found at your local craft store, or online.
-Beading wire: This is a thin, flexible wire specifically designed for making jewelry. It is available in a variety of gauges (thicknesses), but the most common are 26 and 28 gauge.
-Wire cutters: You will need a good pair of flush cutters in order to snip your beading wire and create clean cuts.
-Beading needles: These needles have a large eye and a very sharp point, which makes them ideal for beading work.
-Round nose pliers: These pliers have two cones on the ends, which are used for gripping and shaping wire.
-Head pins: Head pins are thin pieces of wire with a head (usually a flat pad or ball) on one end. They are used to create dangles and drops.
-Jump rings: Jump rings are small metal rings that can be opened and closed with pliers. They are used to connect pieces of jewelry together.
-Lobster clasp: A lobster clasp is a type of fastener that consists of two interlocking pieces (similar to a key ring). It is often used to finish necklaces and bracelets.
-Extension chain: Extension chains are short lengths of chain that can be added to the end of a necklace or bracelet in order to adjust the length.
-Beads! There are endless possibilities when it comes to beads, so have fun exploring all the different kinds that are available.
Step-by-Step Instructions
If you’re new to beading and wire work, these step-by-step instructions will show you how to make beaded earrings. With just a few supplies and a little bit of practice, you’ll be able to make your own beautiful jewelry.
First, gather your supplies. You’ll need:
-Beads (choose whichever style and color you like)
-Wire (22 or 24 gauge is best)
-Wire cutters
-Needle nose pliers (optional)
Next, cut a piece of wire about 6 inches long. Using needle nose pliers, make a small loop at one end of the wire. This will be the top of your earring.
Thread beads onto the wire, sliding them down until they sit close to the loop. Continue adding beads until your earrings are the desired length. We recommend using between 10 and 15 beads per earring.
Once you’ve added all of the beads, use needle nose pliers to make another small loop at the other end of the wire. This will be the bottom of your earring. Trim any excess wire, and you’re done!
Advanced Beading Techniques
There are many different techniques that you can use to make bead and wire jewelry. In this section, we will cover some of the more advanced techniques. These techniques will allow you to make more intricate and beautiful pieces of jewelry.
Wrapped Loops
Wrapped loops are one of the most popular and versatile beading techniques. They can be used to create clean, professional-looking jewelry and are perfect for finishing off the ends of beaded strands.
To create a wrapped loop, start by threading your needle or beading wire through the bead you want to use as the loop. Next, make a small loop in the wire and pass the wire back through the bead. Wrap the wire around the base of the loop several times and then trim off any excess wire. Finally, use your pliers to squeeze the wrapped wire closed so that it is secure.
One thing to keep in mind when working with wrapped loops is that they will add a small amount of bulk to your project. If you are working with delicate beads or need to thread your beads onto a very fine piece of jewelry wire, you may want to consider using another type of loop such as a simple loop or a slip knot loop.
Wirework
If you’re looking for jewelry making ideas, one very popular option is wirework. You can use colored wires to add bright accents to a piece, or opt for more neutral tones for a classic look. With a few basic supplies and some practice, you’ll be able to create beautiful wire jewelry at home.
To get started, you’ll need some beading wire, pliers, and beads. Beading wire is available in a range of sizes and colors, so you can choose the perfect option for your project. Pliers will help you to bend and shape the wire, and beads can be added for extra detail.
There are many different techniques that you can use for wirework jewelry making. One popular option is twisting the wire to create spirals or curls. This is a simple technique that anyone can learn, and it’s a great way to add interest to a piece of jewelry. You can also use hammered or textured wires to create unique effects.
If you want to add beads to your wire jewelry, there are several options available. You can thread them onto the wire before shaping it, or add them after the piece is complete. Beaded wires can be used to create dangles or other embellishments. Or, try using them as clasps or connectors for your jewelry.
With a little practice, you’ll be able to create beautiful pieces of wire jewelry at home. Experiment with different techniques and materials until you find the perfect combination for your next project!